WhatsApp Setup
Prerequisites
Before setting up WhatsApp integration, ensure you have:
- An active AI Chat Assist account
- A business phone number that you want to use for WhatsApp
- A Meta Business Portfolio (see instructions below)
How to Create a Business Portfolio in Meta Business Suite
Step 1: Open Meta Business Suite
- Visit business.facebook.com on a desktop browser.
- Log in using your personal Facebook account.
Step 2: Start Creating the Portfolio
- Once logged in, click “Create a business portfolio”.
- If this option doesn’t appear, you may need to set up a Page first or complete initial setup screens.
Step 3: Enter Business Information
Fill in the required details:
- Business Portfolio Name – The name of your business or brand.
- Your Name – The individual creating the portfolio.
- Business Email Address – Used by Meta for business-related communication.
Step 4: Click “Create” or “Submit”
- After completing the form, click Create (or Submit) to finish creating your portfolio.
Step 5: Verify Your Business Email
- Meta will send a confirmation email.
- Open the email and click the verification link to confirm your business identity.
Step 6: (Optional) Add Business Assets
-
You can now add assets such as:
- Facebook Pages
- Instagram accounts
- Ad accounts
-
Alternatively, skip this step and add them later in Business Settings.
Step 7: (Optional) Add People or Partners
- Invite team members or external partners to help manage your portfolio.
- Assign appropriate access levels: Admin, Employee, or Partner.
Tips & Notes
- You must create a portfolio using a personal Facebook account (Meta uses this to establish your business identity).
- If you don’t have a Facebook Page, Meta may prompt you to create one during the setup.
- Once your portfolio is set up, you can manage assets and permissions in Meta Business Suite Settings.
Quick Start Guide
Follow this simple guide to connect your WhatsApp number to our platform using Meta’s official onboarding process.
This flow applies to ALL users, whether you already have a Business Account or not. Meta will detect your account type and show the correct options automatically.
1. Start the WhatsApp Setup
Inside our platform, click: “Connect WhatsApp”
A Meta popup will open.
2. Log In with Your Meta/Facebook Account
Enter your Facebook login details.
This connects Meta’s system so you can manage WhatsApp Business access.
3. Meta Checks Your Business Setup (Automatic)
Meta now checks what you already have and shows the correct screen.
You may see:
A) Existing Business Found
- If Meta finds a Business Portfolio or Business Manager in your account
- You will see your business listed
- Select it → Click Continue
B) No Business Found
- If Meta does not detect any business
- You will see an option to Create Business
- Click Create
- Enter Business Name
- Continue
(Don’t worry — Meta sets everything up for you.)
4. WhatsApp Business Account Setup
Meta now checks if you already have a WhatsApp Business Account (WABA).
You will see one of the following:
A) Existing WhatsApp Business Account Available
- Select your existing WABA
- Click Continue
B) No WhatsApp Business Account
- Meta will automatically create a new one for you
- (No action needed other than clicking Continue.)
5. Add or Select Your Phone Number
Now choose the phone number you want to use for WhatsApp messaging.
You may see:
A) Your phone number already appears in the list
- Select it → Continue
B) No phone number added yet
- Meta asks you to add one:
- Enter your phone number
- Enter your business display name
- Choose your category
- Click Next
6. Verify Your Number
You will receive a verification code via:
- SMS, or
- Phone Call
Enter the code → Click Verify
Once verified, Meta will connect your number.
7. Give Permissions
Meta will now ask you to grant permissions to our platform so it can:
- Send messages
- Create/manage message templates
- Access and manage connected phone numbers
Click Allow / Continue until you reach the final step.
8. You’re Done!
You will be redirected back to our platform.
Your WhatsApp number is now fully connected and ready for use.
Detailed Setup Process
For more technical details about each step, refer to the following:
Step 1: Access WhatsApp Integration Settings
- Log in to your AI Chat Assist dashboard
- Navigate to WhatsApp Campaign > WhatsApp Number
- Click on “Connect WhatsApp”
After clicking Connect WhatsApp, a Meta dialog box will open to guide you through the setup process.
Step 2: Fill Business Information
- In the Meta dialog box, provide your business details such as company name, industry, and other required information
- Review the terms and conditions if prompted
- Click Next or Continue to proceed
Step 3: Create or Select Your WhatsApp Business Account
- Choose to create a new WhatsApp Business Account or select an existing one
- Enter or confirm your Meta Business Manager credentials if required
- Click Next or Continue to proceed
Step 4: Create a WhatsApp Business Profile
- Fill in your business profile details, including:
- Business name
- Description
- Website
- Address
- Profile picture
- Customize additional settings such as business hours or categories
- Click Next or Continue to proceed
Step 5: Enter Phone Number
- Provide the phone number you want to use for your WhatsApp Business account
(ensure it’s not already linked to a personal WhatsApp account) - Select your country code and confirm the number format
- Click Next or Continue to proceed
Step 6: Verify Phone Number
- Choose a verification method (SMS or voice call)
- Enter the verification code sent to your phone number
- Once verified, confirm the setup and complete final prompts in the Meta dialog
- Return to your AI Chat Assist dashboard to confirm integration is active
Step 7: Confirmation and Dashboard Display
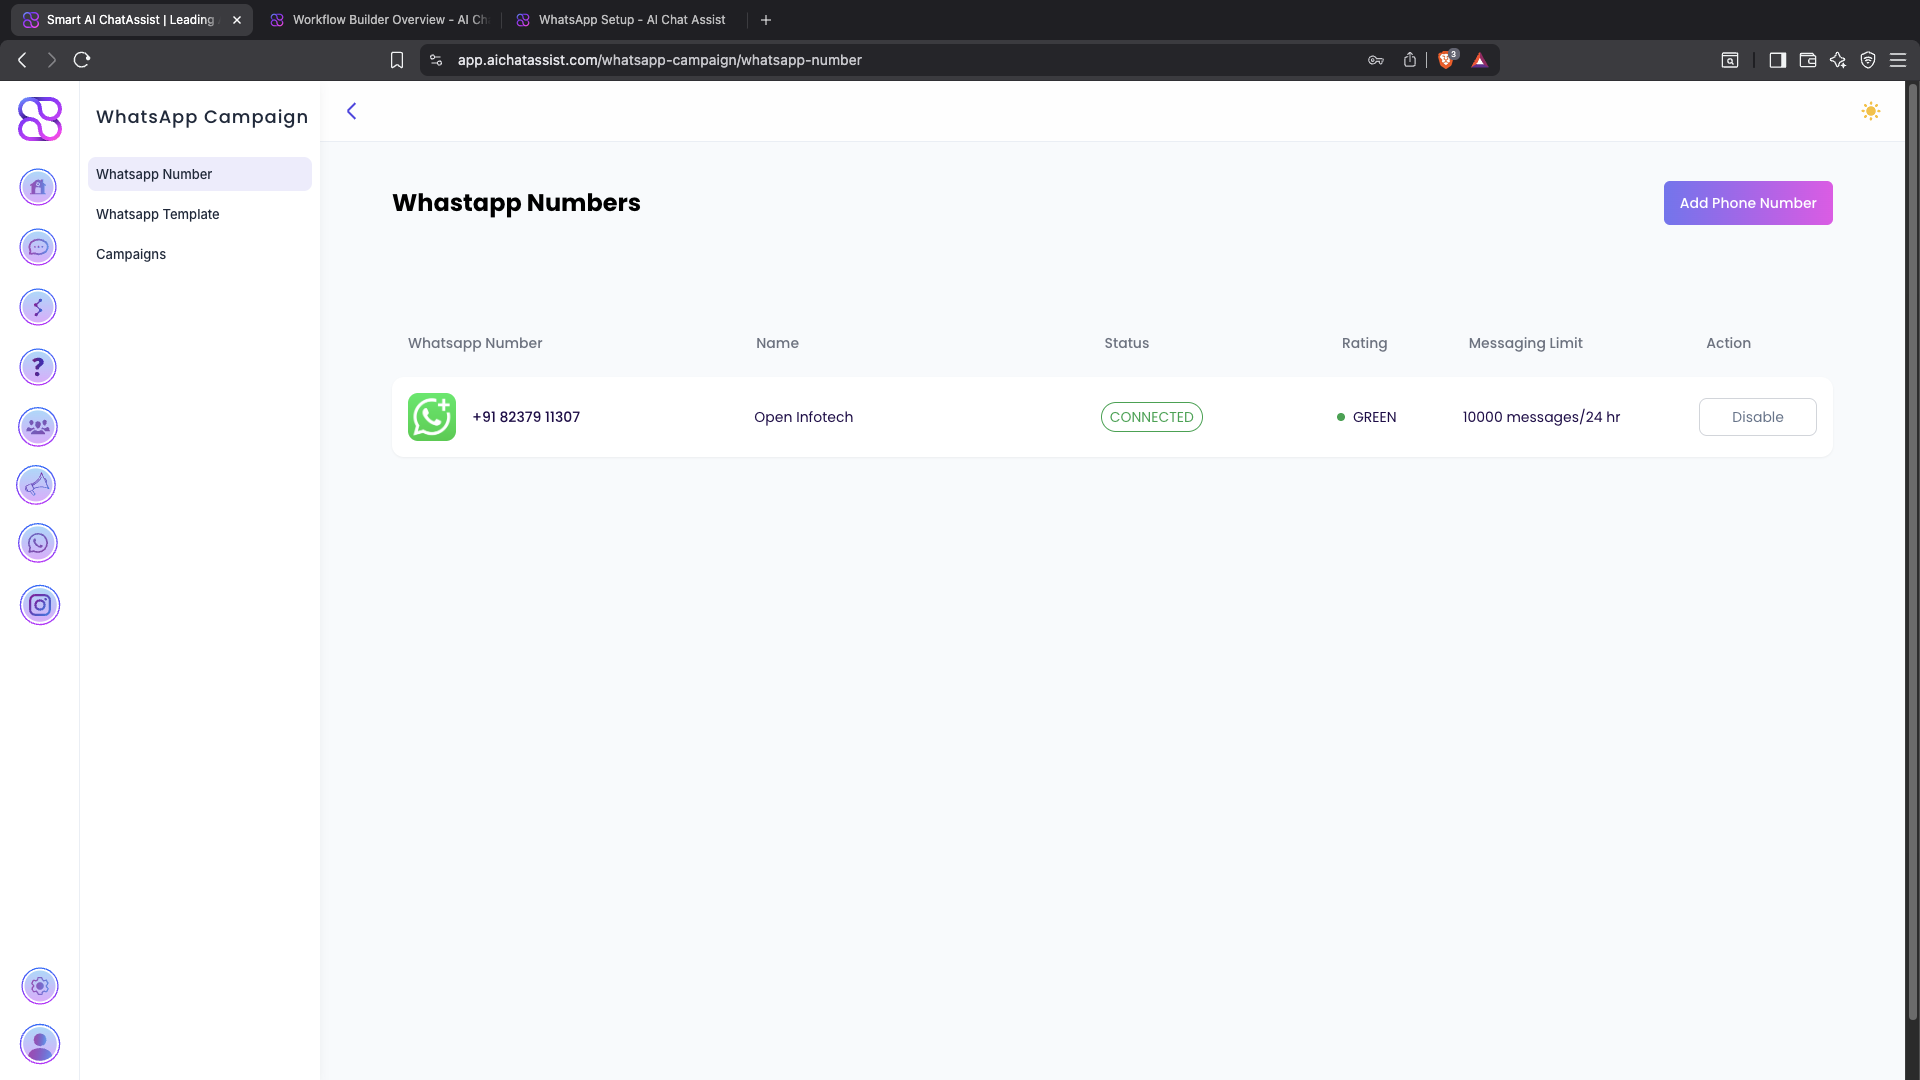
After successful setup, the following details will appear in your dashboard under WhatsApp Campaign > WhatsApp Number:
- WhatsApp Number: The verified number linked to your account
- Name: The business name from your WhatsApp profile
- Status: Connection status (e.g., Connected, Active)
- Rating: Quality rating of your WhatsApp Business account
- Messaging Limit: Daily or tier-based limit (e.g., Tier 1: 1,000 messages/day)
Step 8: Add Payment Method to WhatsApp Account
To ensure uninterrupted messaging:
- Log in to Meta Business Manager
- Navigate to Billing or Payment Settings
- Add a valid payment method (credit card, bank account, etc.)
- Set it as the default for your WhatsApp Business account
- Verify the payment method if prompted
WhatsApp Business API usage may incur costs based on conversation type and message volume. Refer to Meta’s official documentation for detailed pricing information.
Next Steps
Once your WhatsApp integration is set up, you can: