Bot Setup & Features
Bot Setup & Features
This guide will walk you through the process of setting up your AI Chat Assist chatbot and configuring its features for optimal performance.
Getting Started with AI Chat Assist
Step 1: Sign Up for an Account
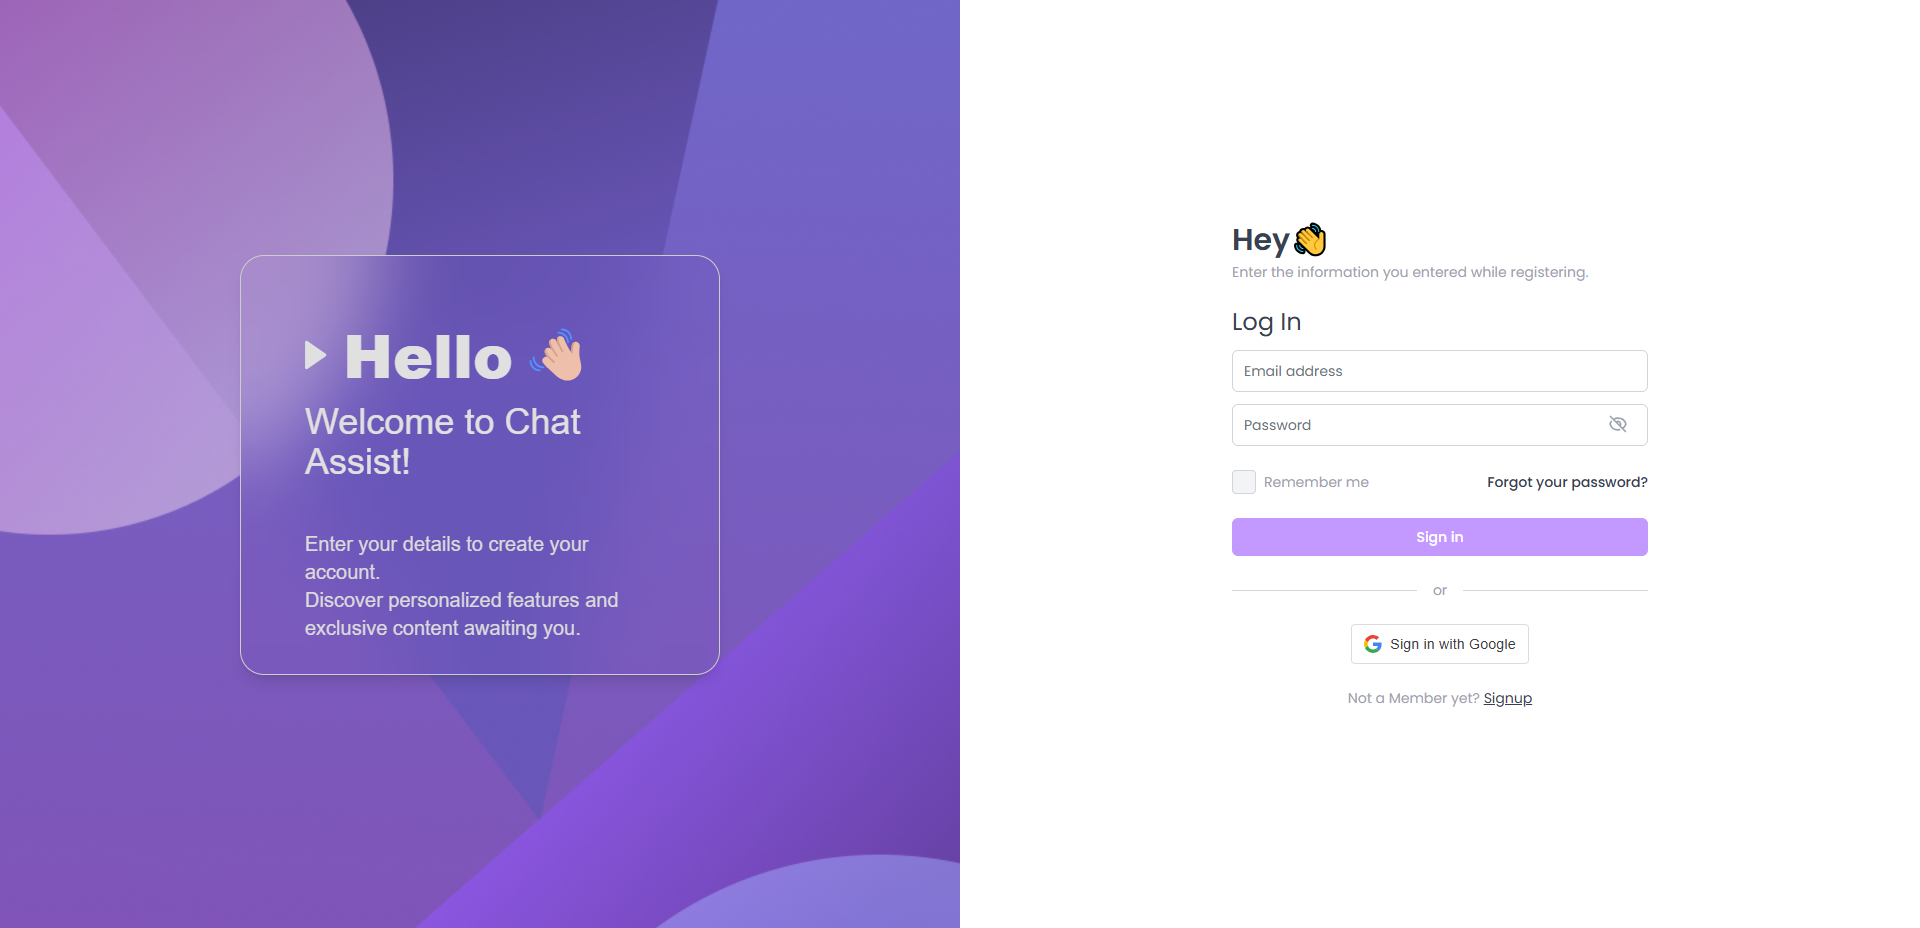
- Visit the AI Chat Assist website
- Enter your details:
- Email address
- Password (must be at least 8 characters with a mix of letters, numbers, and symbols)
- Click Create Account
- Verify your email address by clicking the link sent to your inbox
Step 2: Choose a Subscription Plan
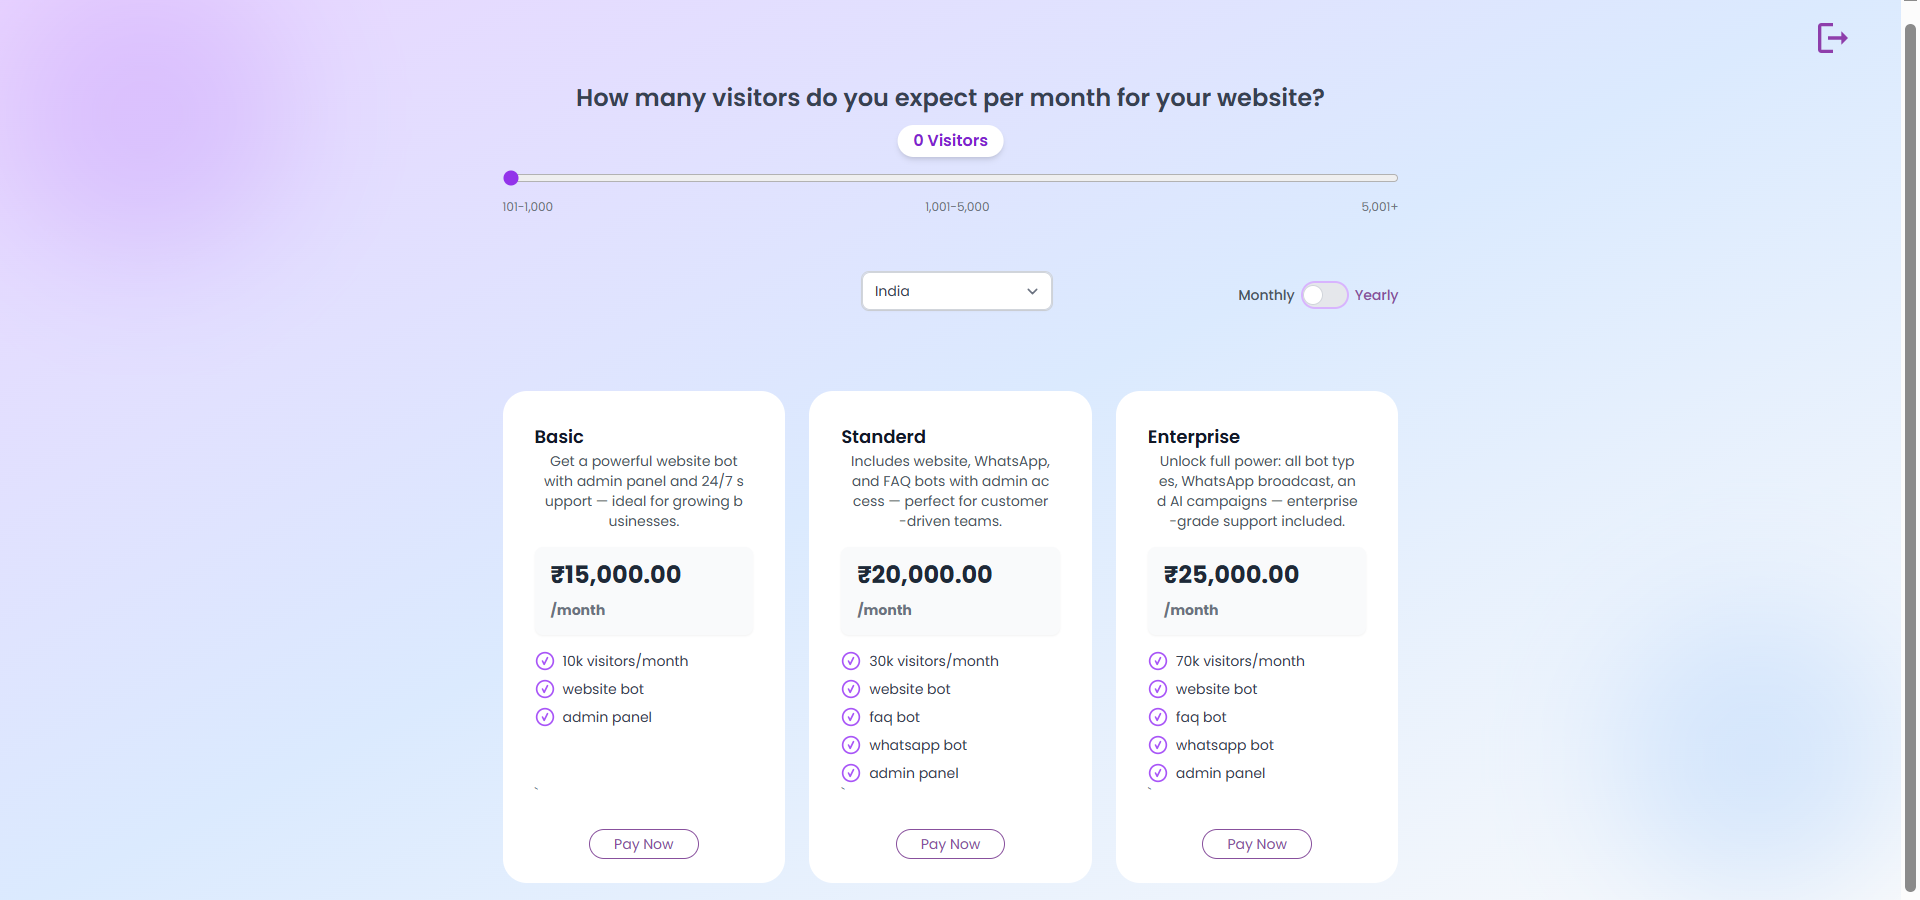
After verifying your email, you’ll need to select a subscription plan:
- Review the available plans
- Select the plan that best fits your needs
- Enter your payment information
- Click Subscribe to complete the process
Step 3: Complete Your Profile
Before creating your first bot, complete your profile information:
Creating Your First Bot
After completing your profile setup, you’ll be guided through a multi-step process to create and configure your chatbot.
Step 1: Website Configuration
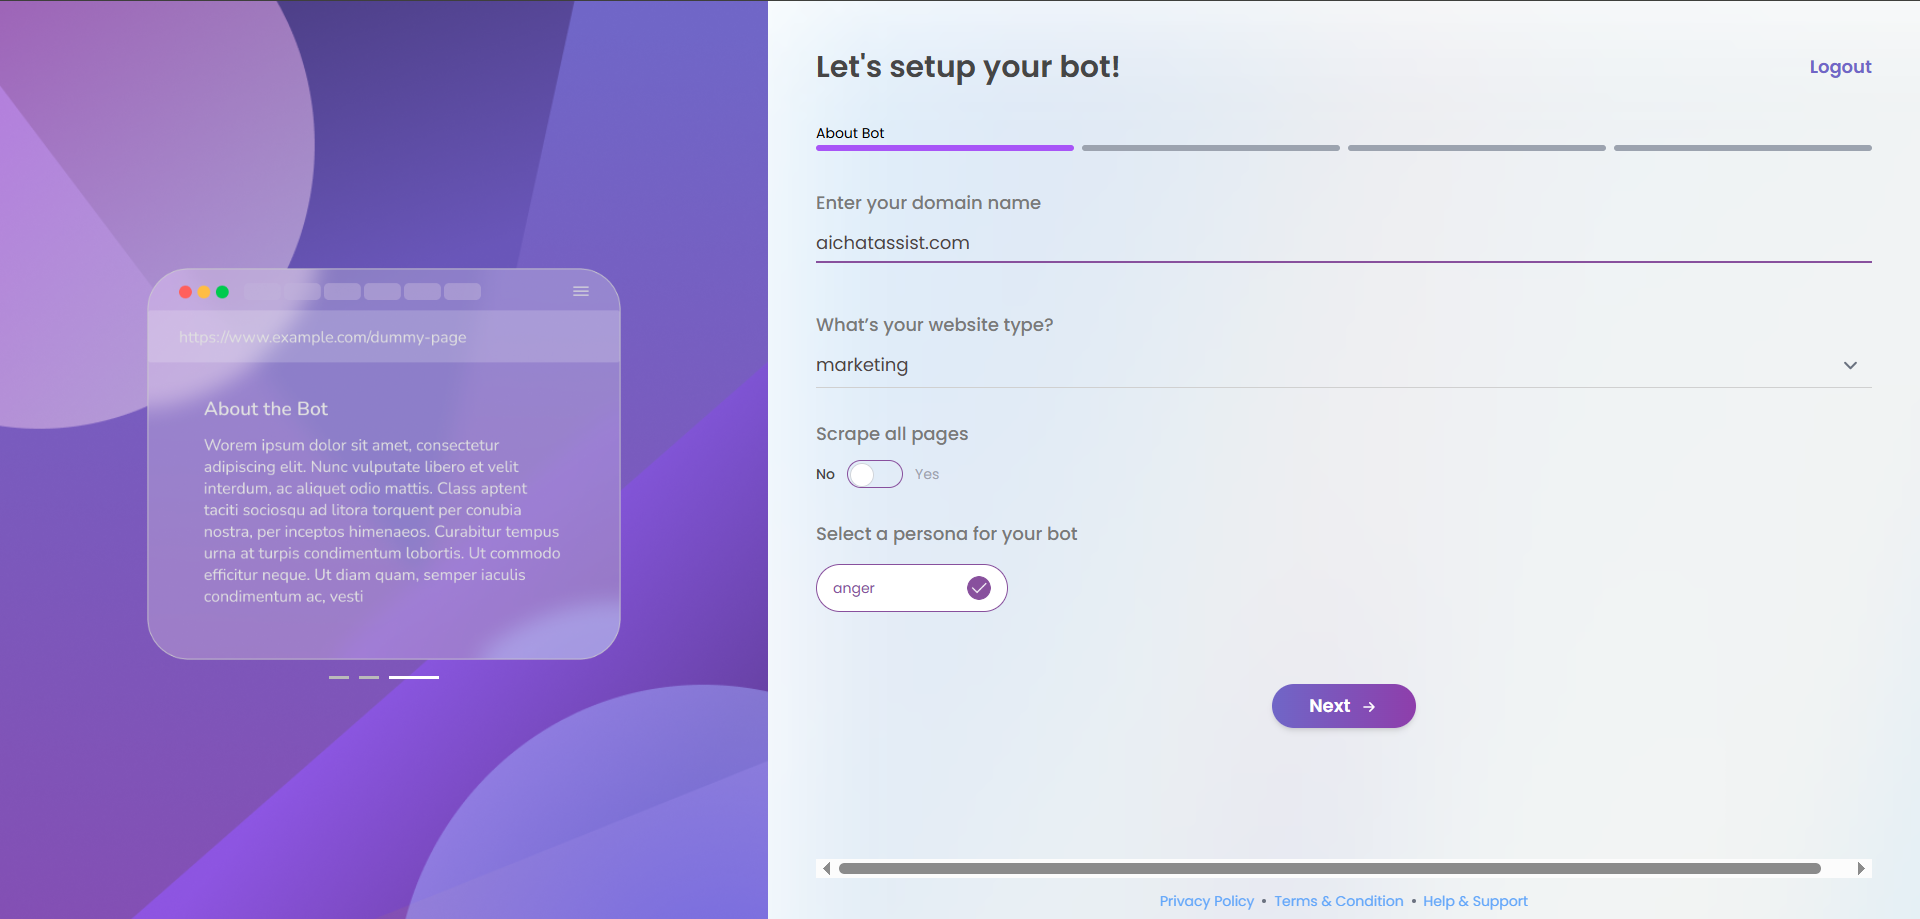
The first step involves configuring your website details and bot persona:
Domain Configuration
- Enter your website domain name in the input field (e.g.,
example.com)- This must be a valid domain format
- Do not include
http://orhttps://prefixes - The system will validate your input and show an error message if the format is incorrect
Website Type Selection
- Select your website type from the dropdown menu
- Options include E-commerce, SaaS, Blog, Portfolio, etc.
- This helps the system optimize your bot’s behavior for your specific industry
- This selection is required and cannot be skipped
Page Scraping Options
- Choose whether to scrape all pages on your website
- Toggle the switch to “Yes” if you want the bot to analyze all pages on your website
- Keep it set to “No” if you want to manually select specific pages later
- Scraping all pages provides more comprehensive knowledge but may take longer
Bot Persona Selection
- Select a persona for your chatbot from the horizontal scrolling list
- Each persona has a different communication style and tone
- Options typically include:
- Professional (formal, business-like tone)
- Friendly (casual, approachable tone)
- Technical (detailed, precise explanations)
- Supportive (empathetic, helpful tone)
- The selected persona will have a purple highlight and checkmark
Navigation
- After completing all required fields, click the Next button to proceed to the next step
- The button will show a loading spinner when processing
- If any required fields are missing or invalid, error messages will appear
- You cannot proceed until all validation errors are resolved
Choosing the right persona is crucial for user engagement. Select a persona that aligns with your brand voice and target audience expectations.
Step 2: Knowledge Base Configuration
In this step, you’ll set up the knowledge base for your chatbot. You have two options: manual knowledge entry or automated website scraping.
Manual Knowledge Entry
If you choose to manually enter knowledge:
- You’ll see a text area where you can input information about your products, services, and company
- This information will be used to train your chatbot to answer questions accurately
- The system requires a minimum of 50 characters
- A character counter will show how many more characters you need if you’re below the minimum
- Error messages will appear if the field is left empty or doesn’t meet the minimum requirement
Provide comprehensive information about your business, products, services, pricing, policies, and common customer questions. The more detailed your knowledge base, the more effectively your chatbot can assist users.
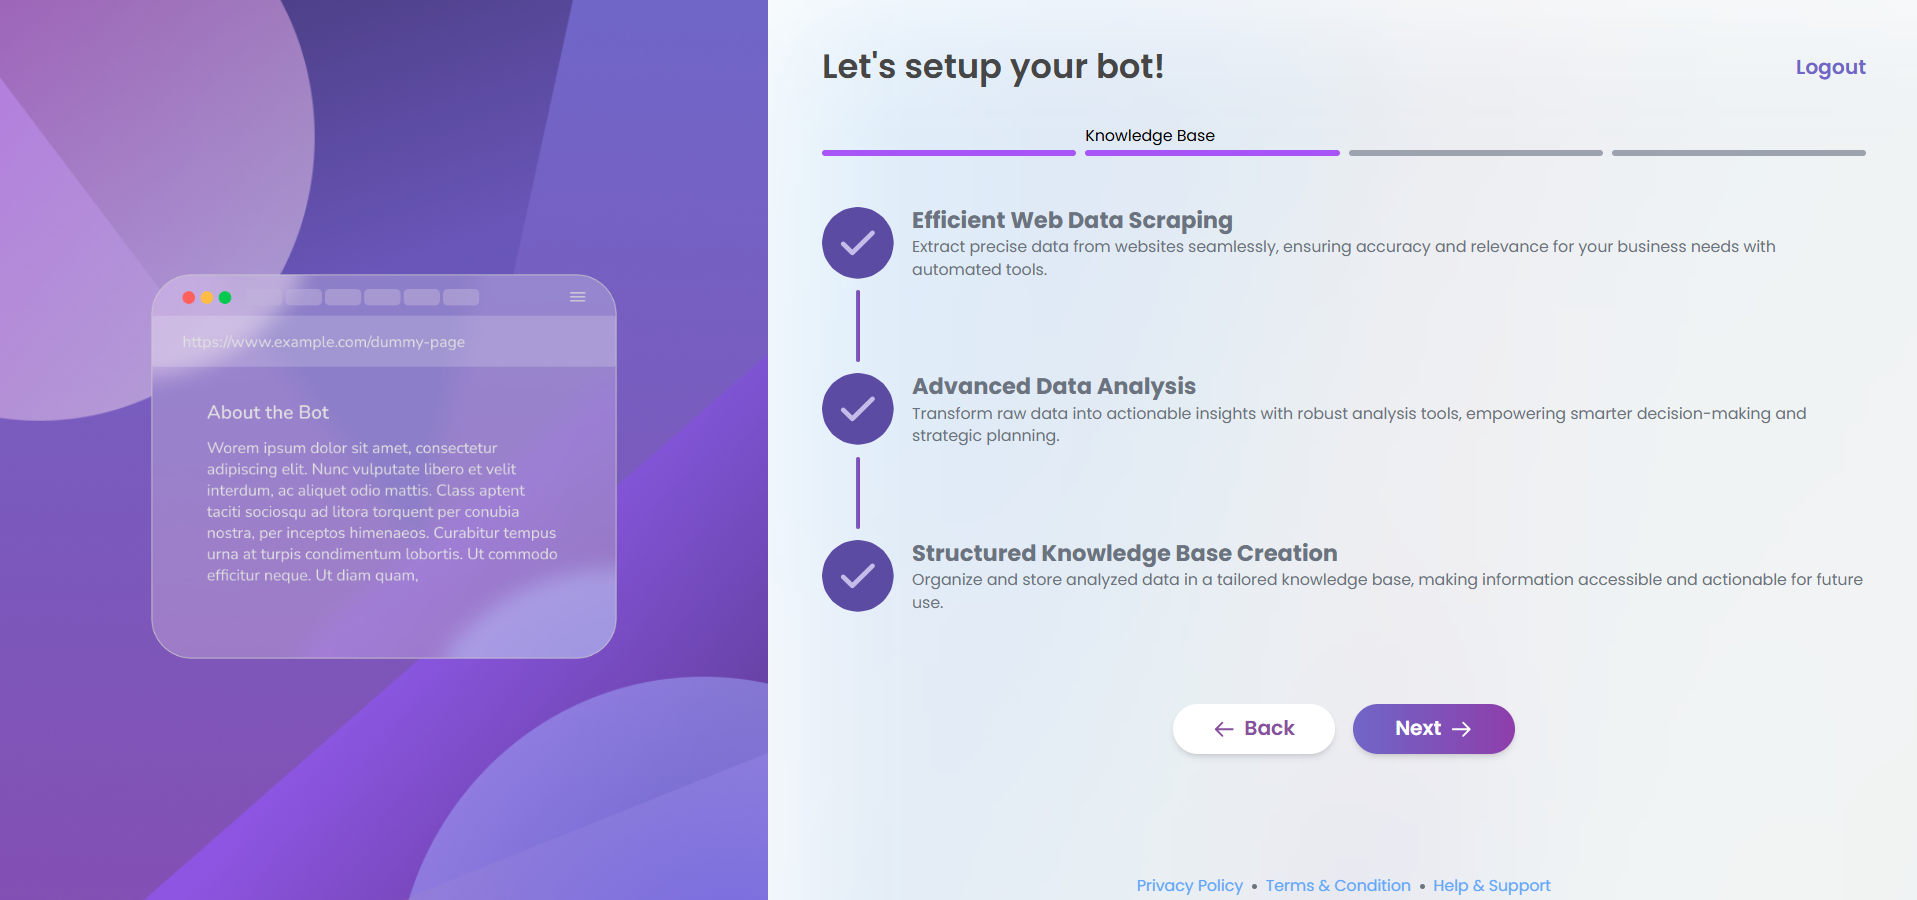
Automated Website Scraping
If you selected “Yes” for scraping all pages in the previous step, you’ll see the automated scraping process:
-
The system will display a progress indicator showing three stages of the scraping process:
- Efficient Web Data Scraping: Extracting data from your website
- Advanced Data Analysis: Processing and analyzing the extracted data
- Structured Knowledge Base Creation: Organizing the information into a usable format
-
Each stage will show one of three states:
- A light purple checkmark (completed stage)
- A spinning loader (current stage in progress)
- A dark purple checkmark (completed with enhanced processing)
-
The system automatically progresses through these stages without requiring user input
- The process duration depends on your website’s size and complexity
- All extracted information will be used to train your chatbot
Website scraping works best on sites with clear, well-structured content. If your website uses complex JavaScript frameworks or has content behind login walls, some information may not be captured. Consider supplementing with manual knowledge entry after the scraping process completes.
Navigation
- Use the Back button to return to the previous step if you need to make changes
- Click the Next button to proceed to the next step once your knowledge base is configured
- For manual entry, the Next button will be disabled until you’ve entered at least 50 characters
- For automated scraping, the Next button will be enabled once all three stages are complete
Step 3: Bot Customization and Configuration
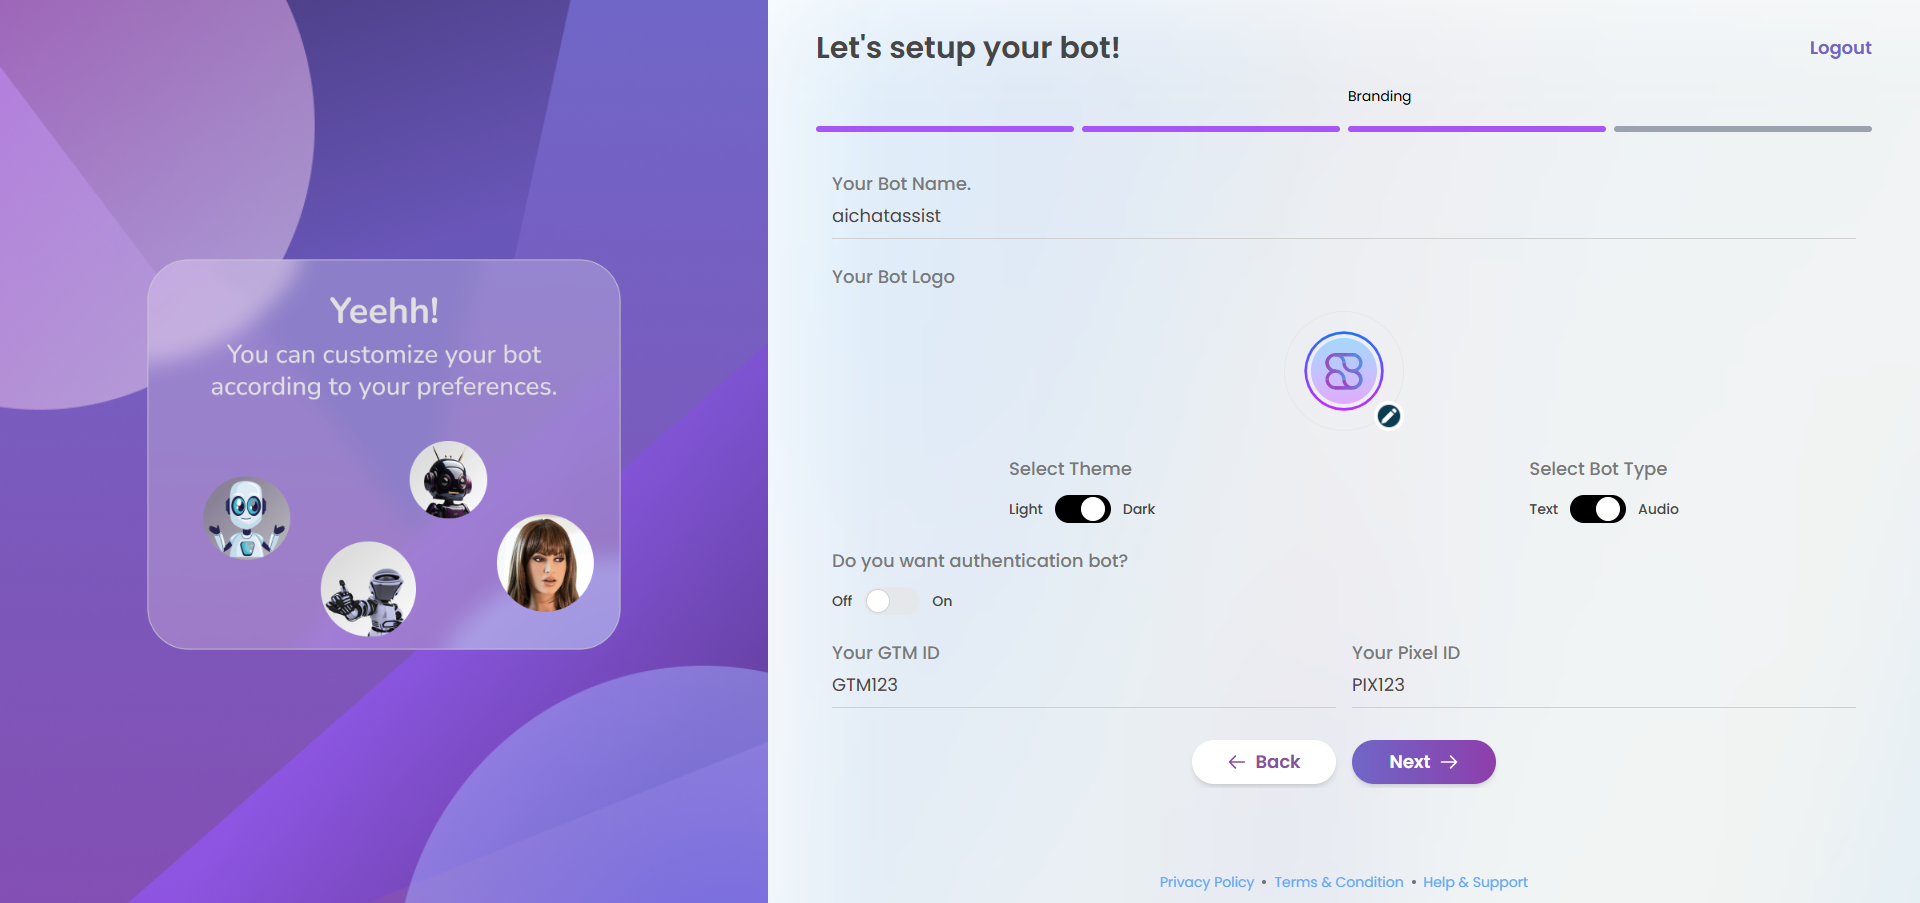
In this step, you’ll personalize your chatbot’s appearance and behavior to align with your brand and specific requirements.
Basic Bot Information
-
Bot Name
- Enter a name for your chatbot in the text field
- This name will be displayed to users when they interact with your bot
- The name is required and cannot be left blank
-
Bot Logo
- Upload a custom logo by clicking the circular upload icon in the bottom right of the logo preview
- Supported formats include JPG, PNG, and SVG
- The logo will appear in the chat interface
- If no logo is uploaded, a default avatar will be used
- A loading animation will display while your logo uploads
Appearance Settings
-
Theme Selection
- Toggle between Light and Dark themes
- Light theme features a bright background with dark text
- Dark theme features a dark background with light text
- The toggle switch will visually indicate your current selection
-
Bot Type
- Choose between Text-only or Audio-enabled bot
- Text-only: Traditional chat interface with text responses
- Audio: Enhanced bot that can process voice input and provide audio responses
- Select the option that best suits your users’ needs and website context
Advanced Features
-
Authentication Bot
- Toggle the authentication feature On or Off
- When enabled, your bot will require user authentication before providing personalized responses
- If enabled, you must enter a userToken key in the field that appears
- This key will be used to validate user sessions
-
Dynamic Knowledge Base (Only available when Authentication Bot is enabled)
- Toggle this feature On or Off
- When enabled, your bot can access user-specific information to provide personalized responses
- Enter your dynamic knowledge base content in the field that appears
- This allows the bot to retrieve and use user-specific data during conversations
Analytics Integration
-
Google Tag Manager Integration
- Enter your GTM ID to track bot interactions in your Google Analytics
- This field is optional but recommended for comprehensive analytics
-
Facebook Pixel Integration
- Enter your Facebook Pixel ID to track conversions and user behavior
- This field is optional but useful for marketing campaigns and retargeting
Integrating analytics tools like GTM and Facebook Pixel allows you to measure the effectiveness of your chatbot, track user engagement, and optimize your conversion funnel.
Navigation
- Use the Back button to return to the knowledge base configuration step
- Click the Next button to proceed once you’ve completed your bot customization
- The button will be disabled if any required fields are empty
- A loading spinner will appear when processing your submission
Step 4: Script Integration
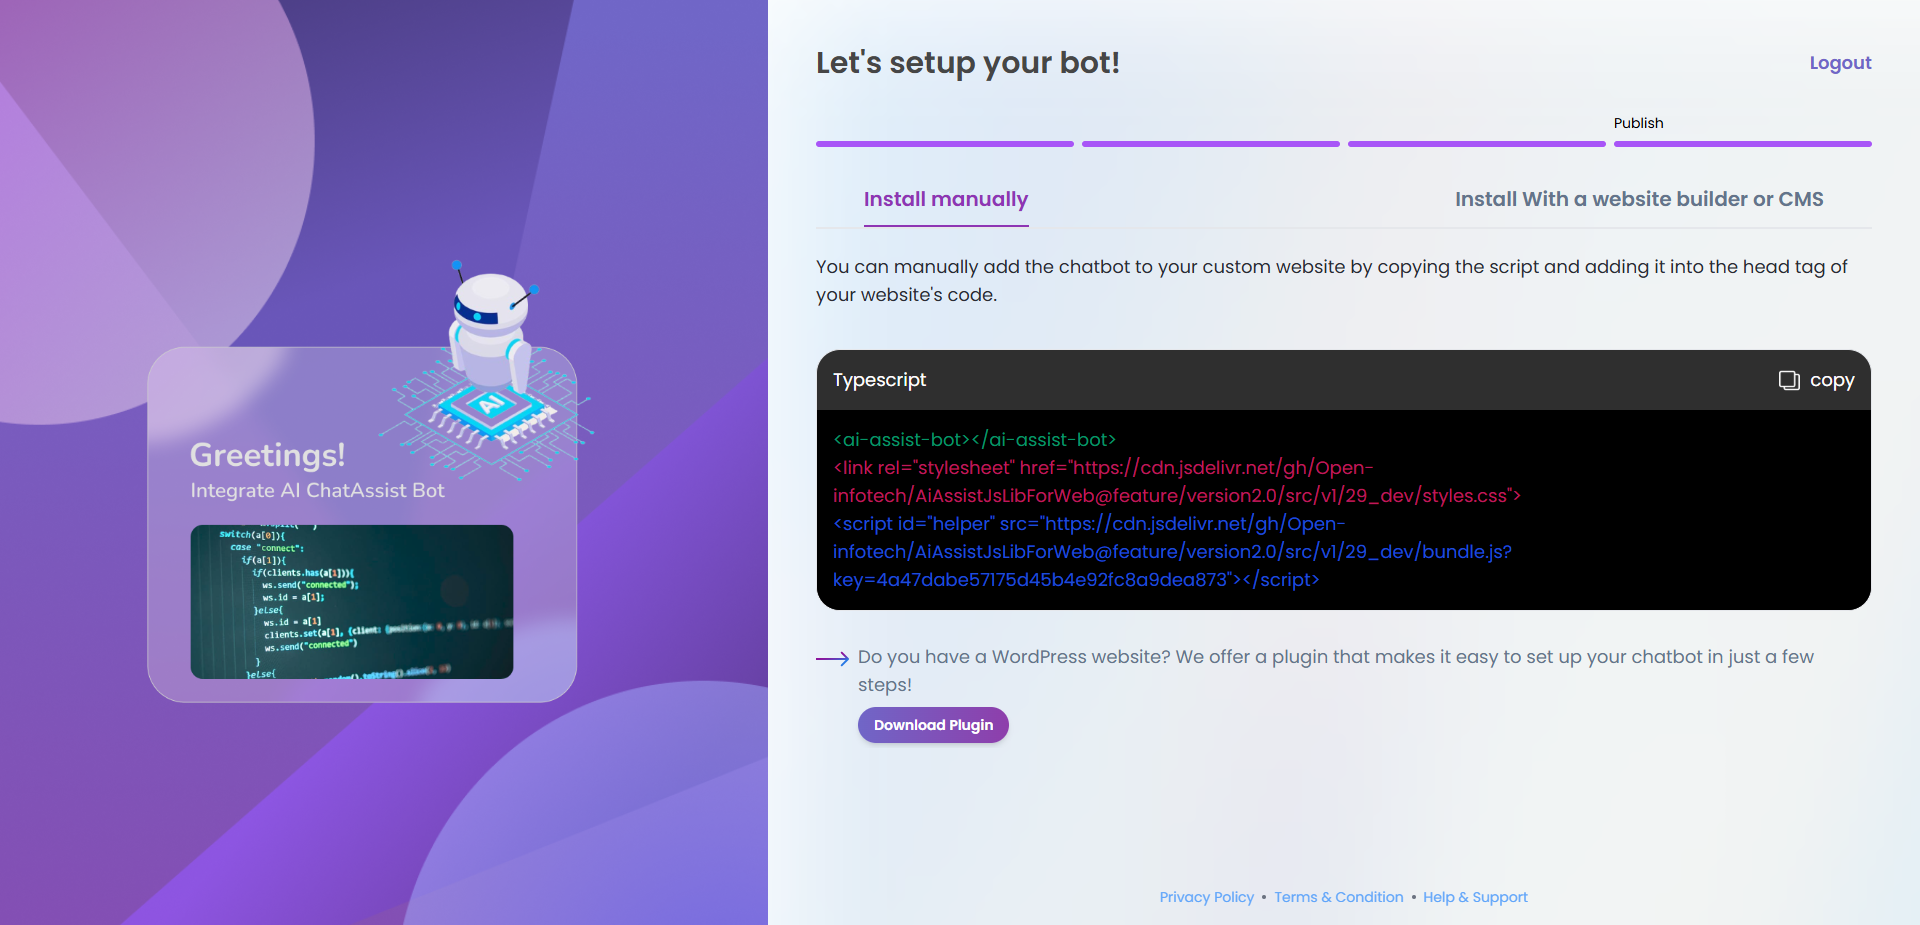
The final step provides you with the necessary code to integrate your chatbot into your website.
Understanding the Integration Code
After completing all previous steps, you’ll receive a custom JavaScript code snippet that needs to be added to your website. The code consists of three main parts:
-
Configuration Variables
- Contains your unique bot ID and settings
- Includes theme preferences, authentication settings, and analytics IDs
- These values are automatically configured based on your previous selections
-
CSS Styling
- Defines the appearance of your chatbot widget
- Matches the theme you selected (light or dark)
- Controls positioning, animations, and responsive behavior
-
JavaScript Code
- Handles the core functionality of your chatbot
- Manages communication between your website and our AI servers
- Implements the features you selected during setup
Adding the Script to Your Website
-
Copy the Code
- Click the “Copy” button in the top-right corner of the code box
- A confirmation message will appear when the code is copied successfully
-
Paste into Your Website
- Add the script to the
<head>section of your website’s HTML - If you’re using a content management system (CMS):
- WordPress: Use a header and footer plugin or edit your theme’s header.php file
- Shopify: Edit your theme’s theme.liquid file
- Wix/Squarespace: Use the custom HTML/CSS section in your site settings
- Add the script to the
Make sure to add the script exactly as provided without modifying any part of the code. Changes to the script may cause your chatbot to malfunction.
WordPress Plugin Option
If you have a WordPress website, we offer a dedicated plugin for easier integration:
- Click the “Download Plugin” button to visit the WordPress plugin page
- Install and activate the plugin on your WordPress site
- Enter your bot credentials in the plugin settings
- The chatbot will automatically appear on your website
The WordPress plugin is recommended for WordPress users as it simplifies the integration process and provides additional customization options directly from your WordPress dashboard.
Troubleshooting
If you encounter any issues with the script integration:
- Ensure the script is placed in the
<head>section of your HTML - Check for any JavaScript errors in your browser’s developer console
- Verify that there are no conflicts with other scripts on your website
- Contact our support team if you continue to experience problems
Next Steps
After successfully integrating the chatbot:
- Test the chatbot on your website to ensure it works correctly
- Customize the FAQ section to improve responses to common questions
- Monitor analytics to track user engagement and optimize performance
Accessing the Admin Panel

After adding the script to your website’s head tag, you can access the admin panel to manage your chatbot:
- Visit https://app.aichatassist.com and log in with your credentials
- From the dashboard, you can:
- View conversation analytics
- Update your knowledge base
- Modify bot settings
- Access support resources
Bookmark the admin panel URL for quick access to your chatbot management interface. Regular monitoring and updates will help improve your bot’s performance over time.